Table of Contents
- Why Assessing Your Home Fall Risks Matters
- Step 1: Evaluate Your Physical Ability and Mobility
- Step 2: Identify Common Trip Hazards and Environmental Obstacles
- Step 3: Complete a Room-by-Room Home Safety Checklist for Seniors
- Step 4: Review Medications and Health Factors
- Step 5: When to Consult an Occupational Therapist Home Assessment
- Taking Action: From Assessment to Safety
- Conclusion
Last Updated: August 27, 2026
Why Assessing Your Home Fall Risks Matters
Falls are one of the most common causes of injury and loss of independence for older adults living at home. A moment of lost balance on the stairs, a slip on a wet bathroom floor, or a trip over clutter can have serious, long-lasting consequences. Understanding how to assess home fall risks is the first step toward creating a safer living environment and maintaining the confidence to move around your own space.
Home fall risk assessment combines three key elements: your physical abilities and mobility, environmental hazards in your home, and health factors that might increase vulnerability. The goal isn’t to eliminate every possible hazard, but to recognize the specific risks that matter most for your situation. A person with strong balance may navigate a space very differently than someone with arthritis or vision loss. By completing this assessment, you can prioritize which changes will make the biggest difference to your safety and independence.
Step 1: Evaluate Your Physical Ability and Mobility
Balance, strength, mobility, and coordination all affect how safely you can move through your home. Simple tests can reveal vulnerabilities and whether a consultation with a healthcare professional makes sense.
The Timed Up and Go Test
The Timed Up and Go (TUG) test is a quick assessment that physical therapists use to evaluate fall risk (peer-reviewed research). It measures balance, strength, and mobility by timing how long it takes to stand up from a chair, walk 3 metres, turn around, and sit back down.
To perform the test:
- Sit in a sturdy chair with armrests
- Wear the shoes normally worn during daily activities
- Stand up, walk at a normal pace to a line or marker 3 metres away
- Turn around at the line
- Walk back and sit down
- Have someone time the entire movement from sitting to sitting
A longer completion time may point to mobility, balance, or strength concerns, but the Timed Up and Go test should not be used by itself to determine fall risk. Results are best considered alongside other factors such as fall history, medications, vision, health conditions, and the home environment. If you have concerns about your mobility or balance, a physiotherapist or other healthcare professional can provide a more complete assessment.
The Sit-to-Stand Strength Assessment
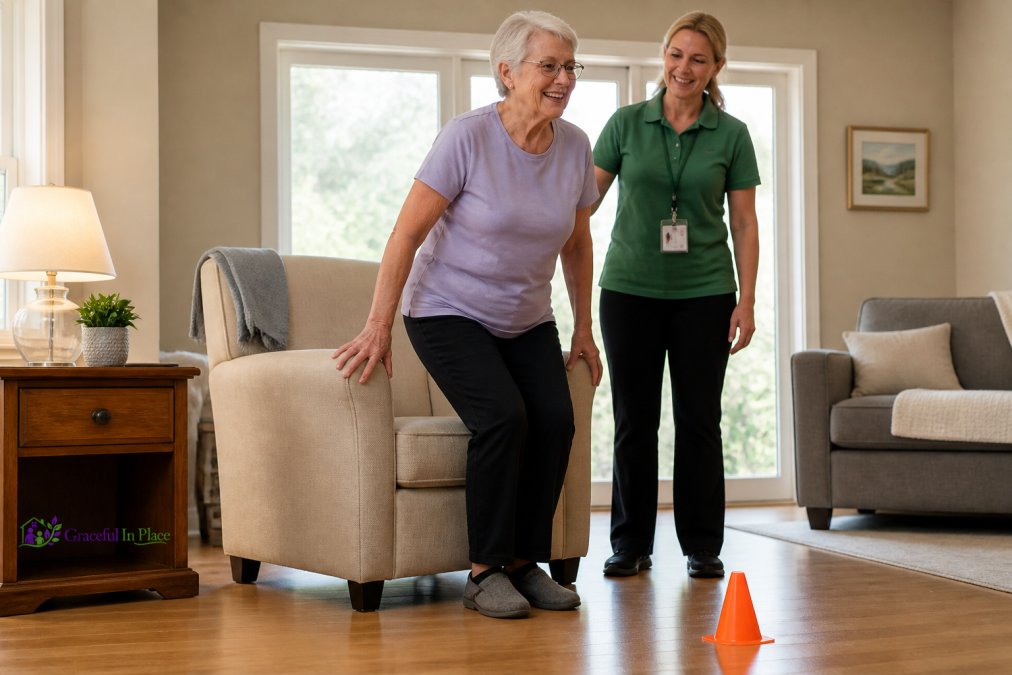
The ability to rise from a seated position without using hands is an important indicator of lower-body strength.
To assess sit-to-stand ability:
- Sit in a sturdy chair at a comfortable height
- Cross arms over chest
- Try to stand without pushing with hands
- If successful, try standing and sitting 5 times in a row at a comfortable pace
If standing without hand support is difficult, it suggests that leg strength may need attention. Many everyday activities, getting out of bed, using the toilet, standing from a low sofa, depend on this strength. Exercises that build leg strength, such as sit-to-stand practice or gentle squats, can improve this ability over time. A physiotherapist can suggest exercises tailored to your needs.
Step 2: Identify Common Trip Hazards and Environmental Obstacles
Environmental hazards are a major piece of fall risk assessment. Many falls happen because of something in the home rather than solely because of physical limitations.
Common trip hazards include:
- Loose rugs and mats that bunch up or shift underfoot
- Clutter on floors, stairs, or in pathways
- Poor lighting in hallways, bathrooms, bedrooms, and stairwells
- Uneven flooring or transitions between rooms
- Slippery floors in kitchens and bathrooms
- Stairs without handrails or with worn treads
Walk through each room looking for anything that could catch a foot, cause a trip, or create an obstacle. Good lighting can make hazards easier to see and help people move more safely through hallways, bathrooms, and bedside areas. Adequate lighting in hallways, bathrooms, and bedside areas reduces fall risk significantly.
Step 3: Complete a Room-by-Room Home Safety Checklist for Seniors
A systematic room-by-room review helps ensure nothing is overlooked.
Entryways and Hallways
Entryways and hallways are high-traffic zones where falls commonly occur. These spaces need to be clear, well-lit, and free of obstacles.
Checklist for entryways and hallways:
- Lighting is bright enough to see clearly at all times of day and night
- Nightlights are installed in hallways for safe navigation after dark
- Flooring is even and in good repair
- Rugs are secured with non-slip pads or removed entirely
- Electrical cords and cables are tucked against walls or secured
- Clutter is cleared from pathways
- Handrails are installed on both sides of stairs if present
- Stairs are in good repair with no loose or worn treads
- Stair edges are clearly visible (consider contrasting tape on each step)
- Doors open and close smoothly
Bathroom Safety Priorities
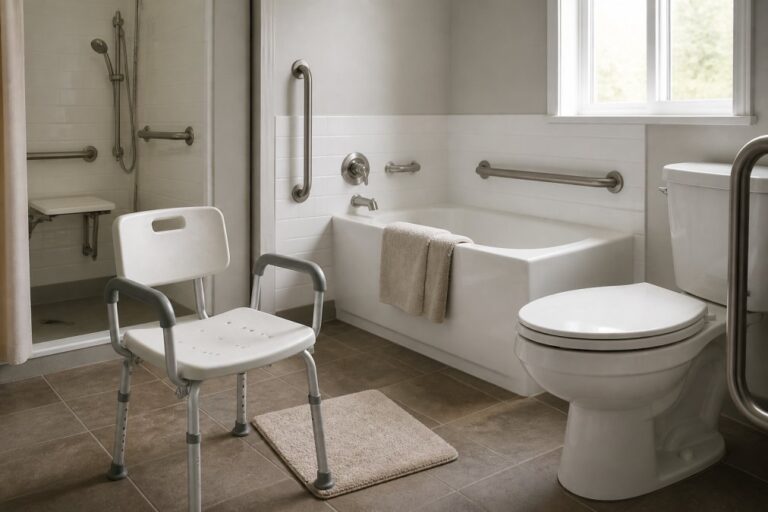
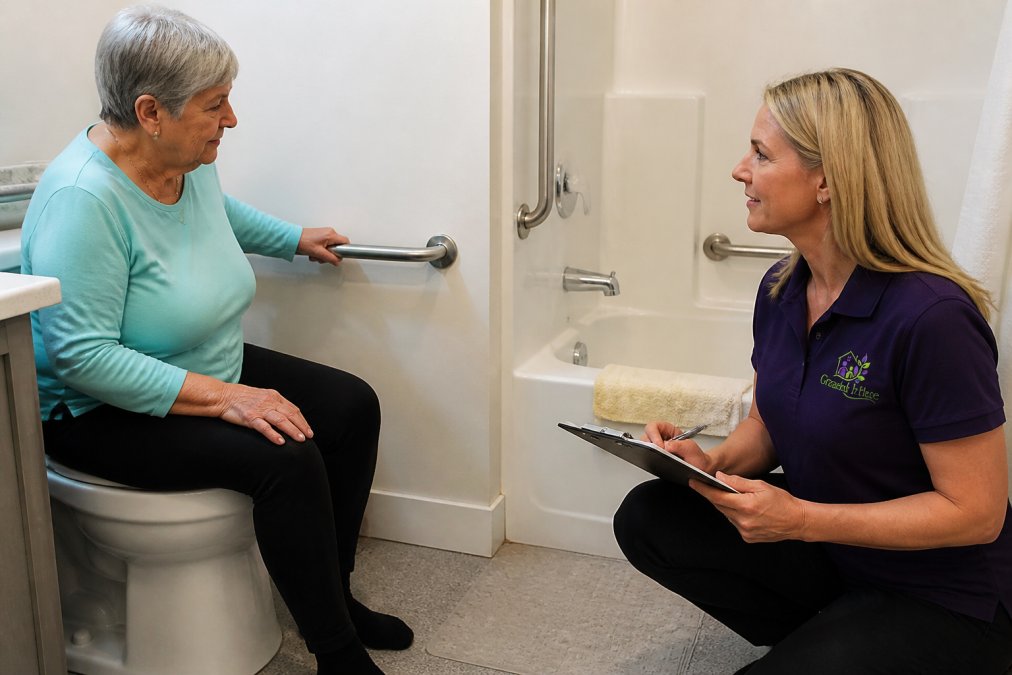
Bathrooms present particular fall risks because they combine water (which creates slippery surfaces), hard fixtures, and often poor lighting.
Checklist for bathrooms:
- Flooring is non-slip (textured tile or non-slip mat)
- Grab bars are installed at the toilet and in the shower or tub
- Grab bars are securely mounted using appropriate structural support and manufacturer-approved hardware.
- Lighting is bright, especially around the toilet and shower area
- A nightlight provides safe navigation if the bathroom is used at night
- The toilet seat height is appropriate (standard or raised seat if needed)
- Shower or tub has a non-slip mat or textured surface
- Shower chair or bench is available if standing for long periods is difficult
- Handheld showerhead allows washing without losing balance
- Bath mat is secured with non-slip backing
- Frequently used toiletries are stored within easy reach.
- Mirrors are positioned so balance is not needed to see them
Bedroom and Bedside Considerations
The bedroom is where many people are most vulnerable. Getting in and out of bed, especially at night, is a common time for falls.
Checklist for bedrooms:
- Lighting is accessible without getting out of bed (bedside lamp or motion-activated light)
- A nightlight illuminates the path from bed to bathroom
- The bed height allows feet to touch the floor when sitting on the edge
- Bedside table is sturdy and at a safe height for reaching items
- Flooring is clear of clutter and cords
- Rugs are secured or removed
- Handrails or grab bars are installed if needed for getting in and out of bed
- A phone or emergency alert device is within reach from bed
- Slippers with non-slip soles are used instead of bare feet or socks
- Heavy curtains or blinds allow control of light
Kitchen and Living Spaces
Kitchens and living areas are active spaces where balance and mobility matter.
Checklist for kitchens and living spaces:
- Flooring is clean and dry; spills are wiped up immediately
- Frequently used items are stored at waist height
- Drawers and cabinet doors close completely
- Adequate lighting is available, especially near the stove and sink
- Pathways between appliances are clear and wide enough to move safely
- Electrical cords are tucked away
- Non-slip mats are placed in front of the sink
- Chairs and furniture are sturdy and don’t tip easily when used for support
- Clutter is minimized
- Throw rugs are removed or secured with non-slip pads
Step 4: Review Medications and Health Factors
Certain medications and health conditions increase fall risk. Reviewing these factors with a healthcare provider can help identify whether adjustments or additional precautions are needed.
Some medications, including certain medicines used for blood pressure, anxiety, pain, sleep, and depression, can cause side effects such as dizziness, drowsiness, or balance problems that may increase fall risk.
Health conditions that affect fall risk include:
- Vision problems that reduce sight or depth perception
- Hearing loss that affects balance and awareness
- Arthritis that limits mobility or causes pain with movement
- Diabetes that may cause numbness in feet or affect vision
- Heart conditions that cause dizziness or shortness of breath
- Neurological conditions that affect balance and coordination
- Cognitive changes that affect judgment or memory
- Urinary incontinence that may cause rushing to the bathroom
Dizziness or lightheadedness when standing up can increase fall risk and may be related to a drop in blood pressure. If this happens regularly, discuss it with a healthcare professional.
Step 5: When to Consult an Occupational Therapist Home Assessment
An occupational therapist (OT) can provide a professional home safety assessment that goes beyond a self-check. An OT is trained to identify hazards, evaluate how you move through your home, and recommend specific modifications tailored to your needs and abilities.
A home assessment by an occupational therapist typically includes:
- Evaluation of balance, strength, and mobility in your actual home environment
- Identification of specific hazards and their risk level
- Recommendations for modifications, equipment, or assistive devices
- Advice on how to use your home more safely given your abilities
- Guidance on exercise or movement strategies to reduce risk
- Written report with prioritized recommendations
An occupational therapist assessment is particularly valuable if:
- A fall has already occurred
- There are significant mobility or balance challenges
- The home is complex (multiple levels, narrow spaces, unusual layout)
- You are unsure which modifications will help most
- Multiple health conditions or medications are affecting safety
In Canada, access to occupational therapy services varies by province and individual circumstances. Services may be available through publicly funded health programs, rehabilitation services, community organizations, or private insurance plans. Check with your provincial or local health services, insurance provider, or healthcare professional to find out what options are available to you.
Taking Action: From Assessment to Safety
Completing an assessment is the first step; acting on the results creates change. Prioritization helps, since not every hazard can be addressed at once.
Start by addressing the highest-risk items first:
- Immediate hazards that pose obvious danger (loose rugs, clutter on stairs, poor lighting in the bathroom)
- Frequent hazards in spaces used daily (bedroom pathway, bathroom, kitchen)
- Personal vulnerabilities identified in physical ability tests (if balance is weak, prioritize grab bars and lighting)
Some changes cost little or nothing: clearing clutter, securing rugs, rearranging furniture, improving lighting. Other changes, like installing grab bars or modifying stairs, may require professional help.
A home safety assessment isn’t something to complete once and forget. As mobility, health, or living situation changes, revisit the assessment to see whether new hazards have emerged or whether previous changes are still working well.
Assessing home fall risks is a practical way to take control of safety and independence. By evaluating physical ability, identifying environmental hazards, and understanding health factors, you can make informed decisions about which changes will matter most. An occupational therapist can provide professional guidance when needed, and small adjustments, better lighting, cleared pathways, grab bars, can make a real difference in daily confidence and safety.
Frequently Asked Questions
What are the most common fall hazards in a home?
The most common fall hazards include loose rugs, clutter on floors, poor lighting, slippery bathroom surfaces, unstable furniture, stairs without handrails, and throw pillows or objects left on steps. Environmental hazards like these account for a significant portion of falls. Walk through your home systematically to spot these issues, paying special attention to bathrooms, kitchens, and pathways you use daily.
How can I perform a basic home safety audit?
Start by walking through each room and noting hazards. Use a room-by-room home safety checklist for seniors to stay organized. Check lighting levels, floor surfaces, clutter, stairs, grab bars, and furniture placement. Take photos of problem areas. If mobility challenges are present, perform the Timed Up and Go test to understand your balance and gait stability. Document your findings so you can prioritize which changes to make first.
When should I consult an occupational therapist home assessment?
Consider consulting an occupational therapist if you’ve experienced a fall, have significant mobility impairment, use assistive devices like walkers or canes, have vision or hearing changes, or feel unsafe moving around your home. An occupational therapist can conduct a professional assessment tailored to your specific needs and home layout, identifying hazards you might miss and recommending modifications suited to your situation.
What is the Timed Up and Go test and why does it matter?
The Timed Up and Go test measures how long it takes you to rise from a chair, walk 3 metres, turn around, and return to sitting. The test assesses balance, gait stability, and fall risk. A longer completion time may indicate mobility or balance concerns, but the test should not be used on its own to determine fall risk. This simple test helps you understand your mobility baseline and whether professional assessment or physical therapy might be helpful.