
Table of Contents
- Why Home Design Matters for Aging in Place
- Creating Zero-Step Entryways and Accessible Thresholds
- Best Bathroom Modifications for Seniors
- Widening Doorways and Hallways for Mobility
- Lighting and Visibility Throughout Your Home
- Home Accessibility Checklist for Every Room
- Planning Single-Floor Living and Layout Adaptations
- Maintaining Your Aging in Place Modifications
- Frequently Asked Questions
Last Updated: September 2, 2026
Why Home Design Matters for Aging in Place
The difference between feeling trapped in your own home and feeling confident moving through it often comes down to thoughtful design choices. Aging in place home design isn’t about making a house look institutional or preparing for decline, it’s about removing barriers that get in the way of independence and dignity.
When a doorway is too narrow, a bathroom is slippery, or a threshold catches your toe, these aren’t minor inconveniences. They’re daily friction that erodes confidence and forces unnecessary dependence on others. Good aging in place home design solves these problems quietly, so the focus stays on living rather than navigating obstacles.
This guide covers the design changes that matter most: entryways, bathrooms, hallways, lighting, and floor layouts. Each section explains what works, why it works, and how to think about your own space.
Creating Zero-Step Entryways and Accessible Thresholds
A zero-step entry, or at minimum a single-step threshold that can be managed, is foundational to aging in place. It’s the difference between coming and going on your own terms and depending on someone else to help you navigate the entrance.
Zero-step entryways work by bringing the interior floor level flush with the exterior ground or a gentle ramp. This eliminates the trip hazard and physical strain of stepping up. If a full ramp isn’t practical, a beveled transition strip can reduce the lip height and make the threshold easier to cross.
For homes where major construction isn’t possible, a portable ramp or threshold ramp offers flexibility. The key consideration is stability, the ramp needs to be secure and non-slip, with edges that won’t catch wheels or canes.

When designing an entryway, think about approach, clearance and maneuvering space. A person using a walker or wheelchair needs enough room to approach the door, position themselves and operate it safely. The amount of space required depends on the doorway, door swing and mobility device, so major accessibility renovations should follow applicable Canadian accessibility guidance and local building requirements.
Lighting at the entry is essential. A dark threshold is a fall risk. Overhead lighting or motion-activated lights help you see clearly, especially in evening hours. If the entry is recessed or shaded, add a light fixture that illuminates the threshold and approach.
Best Bathroom Modifications for Seniors
The bathroom presents more fall and injury risk than almost any other room. Water, hard surfaces, and the physical demands of bathing create significant hazards. Smart bathroom modifications address these directly, making the space safer without sacrificing function or comfort.
Grab Bars and Support Rails
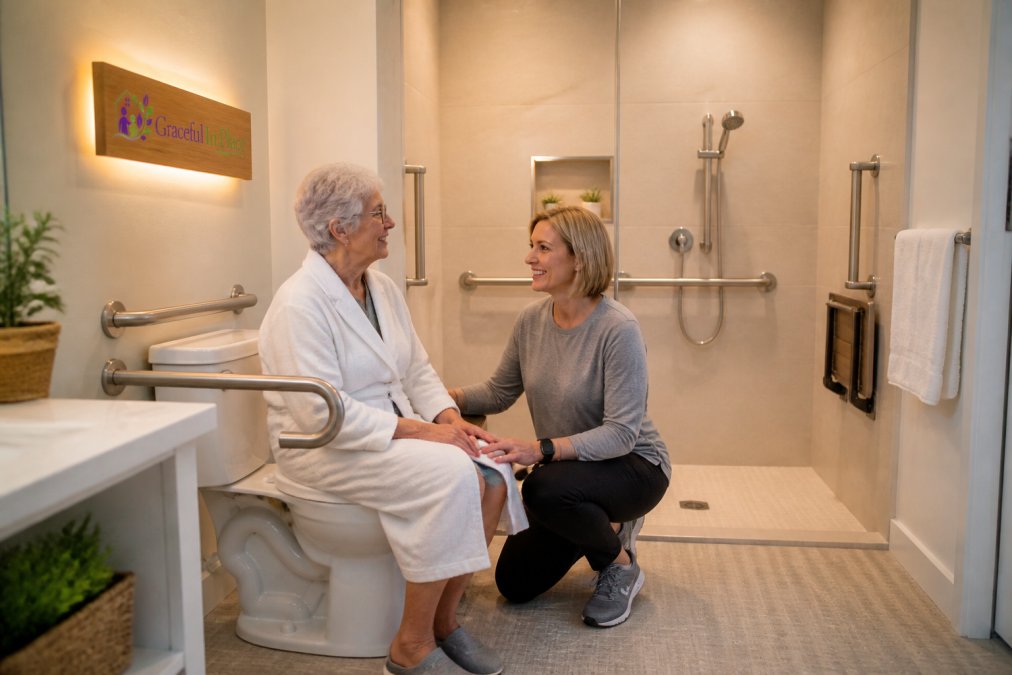
Grab bars are the single most effective bathroom safety feature. They provide stability when moving between the toilet and floor, entering or exiting the shower, or standing at the sink. The key is placement and installation.
Grab bars work best where you actually need support. Common locations include beside the toilet and inside the shower or tub, but the best position and orientation depend on the person, the bathroom layout and how the bar will be used. Grab bars must be securely installed according to the manufacturer’s instructions and appropriate building requirements so they can safely support the intended load.
Grab bars are available in different diameters, and grip comfort can vary from person to person. Canadian accessibility guidance includes grab bars with circular diameters in the range of approximately 3 to 5 centimetres. Look for a slip-resistant gripping surface without sharp or abrasive elements.
Depending on the shower layout and the user’s needs, more than one grab bar or a combination of horizontal, vertical or angled support may provide useful support in different positions.
Curbless Showers and Walk-In Tubs
A curbless shower (also called a zero-threshold shower) eliminates the step into the shower area, removing a major trip hazard and making it easier to use a shower chair or wheelchair without struggling over a lip.
Curbless showers require careful slope and drainage design. The shower floor must slope gently toward a drain so water doesn’t pool on the bathroom floor. This requires proper substrate preparation and waterproofing, so installation by a qualified contractor is important.
A handheld showerhead works well with curbless showers and shower chairs. You can direct water where you need it without standing, and you have one less thing to reach up to adjust. Pair it with a pressure-balance valve so temperature stays consistent even if someone else uses water elsewhere in the home.
Walk-in tubs offer an alternative to traditional tubs. They have a door that opens on the side, allowing you to step in without lifting your leg high. The tub fills while you’re seated inside, and a drain empties it before you exit. Walk-in tubs take up more space and take longer to fill and drain, which is worth considering in your daily routine.
Non-Slip Flooring and Lever-Style Hardware
Wet bathroom floors are slippery. Non-slip flooring reduces this risk significantly. Options include textured tile with a matte finish, vinyl flooring with built-in grip, and rubber flooring. The texture should be subtle enough to clean easily but pronounced enough to provide traction when wet.
Lever-style door handles and faucet handles are easier to operate than knobs, especially if you have arthritis or reduced grip strength. A lever requires less force and no twisting motion. Single-lever faucets (one handle controls both temperature and flow) are simpler to use than separate hot and cold handles.
Consider the height and accessibility of fixtures too. A sink that is comfortable to reach while standing may not work as well for someone who uses a wheelchair or has limited reach or shoulder mobility. When renovating, choose fixture heights and clearances based on the needs of the person using the space.
Widening Doorways and Hallways for Mobility
Doorways and hallways that work comfortably for someone walking unassisted may become difficult to navigate with a walker, wheelchair or other mobility aid. Wider, unobstructed openings and paths of travel can make movement through the home easier and reduce the need to angle or reposition mobility equipment.
Wider doorways can also make it easier to move equipment, furniture and other large items through the home.
If you’re planning renovations specifically for wheelchair or mobility-device access, check current Canadian accessibility guidance and applicable local building requirements before deciding on doorway and hallway dimensions. The appropriate clearances depend on the mobility device, doorway configuration and maneuvering space available.
Door swing direction affects how much space you actually have. An inward-swinging door takes up floor space in the room. An outward-swinging door takes up hallway space. In some cases, a pocket door (which slides into the wall) or a barn-style sliding door can save space compared to a swinging door.
Where practical, doorway thresholds should be minimized, beveled or eliminated to reduce tripping hazards and make it easier for wheels and mobility aids to pass through. When renovating for accessibility, follow applicable standards and local building requirements for allowable threshold height and design.
Lighting and Visibility Throughout Your Home
Poor lighting is a common fall risk that’s easy to overlook. Shadows, dark corners, and insufficient light at stairs or transitions between rooms all increase the chance of a misstep.
Task lighting should be bright and directed where you need it: at the sink, in kitchen work areas, at bedside for reading, and at stairs. Overhead lighting alone is usually not enough. A combination of overhead fixtures and task lights creates visibility without glare.
Motion-activated lights in hallways and bathrooms are practical. They turn on automatically when you move through at night, so you don’t fumble for a switch in the dark. This is especially useful in bathrooms where you might be groggy or unsteady.
Avoid harsh transitions between light and dark areas. Gradual transitions reduce fall risk. Nightlights in hallways and bathrooms help maintain visibility without being bright enough to disturb sleep.
Choose lighting that provides good visibility without uncomfortable glare. Preferences for warmer or cooler light vary, and dimmable fixtures can make it easier to adjust brightness for different activities and times of day.
Switches should be easy to reach and clearly visible. Consistent placement throughout the home makes them easier to locate, while rocker-style switches may be easier to operate than small toggle switches for people with limited hand dexterity.
Home Accessibility Checklist for Every Room
A systematic walkthrough of each room helps you spot barriers you might otherwise miss. This checklist covers the main accessibility considerations:
| Room | Key Considerations | Priority Items |
|---|---|---|
| Entryway | Step-free or low-step entry, adequate lighting, stable handrails | Zero-step entry, motion-activated light |
| Hallways | Adequate clearance for mobility aids, clear of clutter, good lighting, handrails where appropriate | Good lighting, handrails where appropriate |
| Bathroom | Non-slip flooring, grab bars, lever hardware, adequate lighting | Grab bars near toilet and tub, non-slip flooring |
| Kitchen | Counter height, appliance accessibility, clear floor space | Lever handles, adequate under-counter clearance |
| Bedroom | Clear path to bathroom, adequate lighting, stable furniture | Nightlight, sturdy bedside table, appropriate bedside support if needed |
| Stairs | Handrails both sides, adequate lighting, non-slip treads | Handrails, lighting at top and bottom |
| Living Areas | Pathways clear of trip hazards, adequate seating with armrests | Remove clutter, stable seating options |
Work through this checklist room by room. Mark items as completed, in progress, or not applicable. This gives you a clear picture of what matters most and helps you prioritize modifications based on where you spend the most time and where risks are highest.
Planning Single-Floor Living and Layout Adaptations
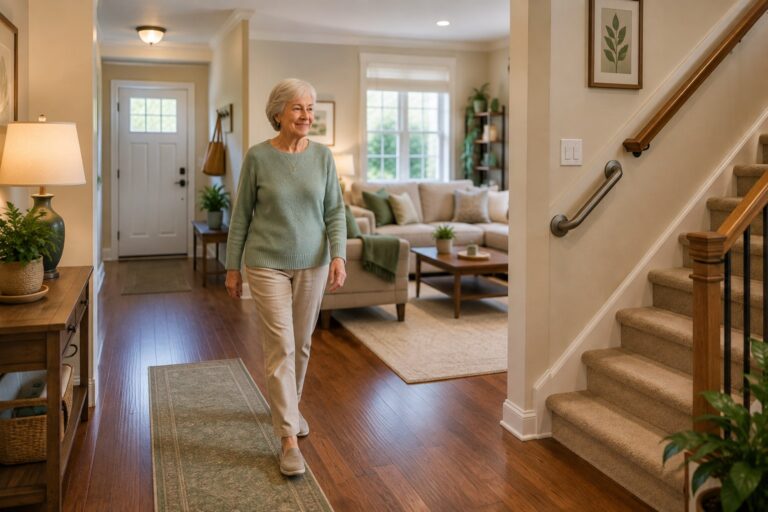
As mobility changes, the ability to manage stairs becomes an important consideration. Single-floor living, where bedrooms, bathrooms, and main living areas are all on one level, eliminates this barrier entirely.
If your home has multiple levels, moving the primary bedroom to the main floor is often the most practical first step. This keeps you on one level for most of your day and reduces the number of times you need to navigate stairs.
A stair lift or residential elevator may be another option for maintaining access to multiple levels. A stair lift carries a seated user along a rail installed alongside the staircase, while a residential elevator typically requires more extensive planning, space and construction. Suitability depends on the home, the user’s mobility needs and professional assessment.
In some cases, rearranging your layout, moving the kitchen closer to the living area or consolidating daily activities to one zone, can reduce the distance you need to travel and the number of transitions between levels.
Think about your daily routine. Where do you spend the most time? Where do you need to go most often? Design your modifications around these patterns rather than trying to make every area equally accessible.
Maintaining Your Aging in Place Modifications
Modifications aren’t set-and-forget. They need regular maintenance to stay safe and functional.
Grab bars should be checked periodically to ensure they’re still firmly mounted. If you notice movement, looseness, corrosion or damage, stop relying on the bar for support until it has been inspected and properly repaired or replaced. Follow the manufacturer’s care and maintenance instructions for the specific product.
Non-slip flooring wears over time. Regular cleaning maintains grip, but heavily trafficked areas may eventually become smoother. Be aware of this and consider refinishing or replacement if traction decreases noticeably.
Ramps and threshold modifications should be inspected for damage, warping, looseness or separation. Canadian freeze-thaw conditions can be particularly hard on outdoor surfaces and connections. Follow the manufacturer’s maintenance instructions or have permanent structures inspected and repaired when deterioration appears.
Lighting fixtures should be cleaned regularly so dust doesn’t reduce brightness. Replace bulbs promptly, a dark room is a fall risk. Consider upgrading to LED bulbs, which last longer and use less energy.
Doors and hardware should operate smoothly. Hinges can loosen over time. Lever handles may need lubrication if they become stiff. These small maintenance tasks prevent bigger problems.
An annual walkthrough of your home, looking specifically at accessibility features, helps catch small issues before they become safety concerns. Make it part of your seasonal maintenance routine.
Aging in place home design is fundamentally about choice. It’s about being able to stay in the home you know and prefer, moving through it safely and independently, without depending on others for everyday tasks. The modifications covered here, zero-step entries, accessible bathrooms, wider doorways, good lighting, and thoughtful layouts, address the real barriers that get in the way of that independence.
Whether you’re planning modifications now or responding to changes in mobility, the goal is the same: a home that works with you, not against you.
Frequently Asked Questions
What are the most important home modifications for aging in place?
The most critical modifications focus on fall prevention and mobility. Prioritize zero-step entryways or ramps, grab bars in bathrooms, improved lighting throughout your home, non-slip flooring, wider doorways for walkers or mobility aids, and accessible bathroom features like curbless showers. Start with areas where you spend the most time and address the highest-risk zones first, such as bathrooms and entryways.
How can I make my home more accessible for seniors without major renovations?
Many accessibility improvements don’t require major renovations. Improvements may include adding task lighting, using lever-style door handles and faucet controls, removing tripping hazards such as loose rugs, and rearranging furniture to create clear pathways. Properly selected and securely installed grab bars or handrails can also provide additional support where needed.
What should I consider when planning bathroom modifications for seniors?
Best bathroom modifications for seniors include adequate grab bars positioned at the toilet, shower and bathtub, curbless or low-threshold showers, non-slip flooring, lever-style faucets and door handles, handheld showerheads, and adequate clearance space for mobility aids. Consider water temperature controls to prevent scalding, bright task lighting around mirrors and the shower area, and storage that doesn’t require reaching above shoulder height. For more complex modifications, an occupational therapist or other qualified professional can help determine which changes best fit the person’s needs and the home’s layout.
How do I balance aesthetics and accessibility in home design?
Universal design integrates safety features into attractive, functional spaces. Modern grab bars come in finishes that complement bathroom décor, lever-style hardware is available in contemporary styles, and non-slip flooring can be stylish and durable. Wide doorways and clear sightlines improve both safety and the sense of spaciousness. Work with an occupational therapist or designer experienced in accessible design to create modifications that enhance rather than compromise the look and feel of your home.
What role does an occupational therapist play in home design for aging in place?
An occupational therapist can assess how a person’s abilities, daily activities and home environment interact and may recommend changes that make everyday tasks safer or easier. Depending on the assessment, this might include looking at mobility routes, lighting, bathroom use, storage access and the placement of support equipment. For major renovations, recommendations may also need to be coordinated with qualified contractors and applicable building requirements.
Can I implement aging in place modifications gradually, or should I do everything at once?
A phased approach works well for most people. Start with high-risk areas like bathrooms and entryways, then move to other rooms as budget and lifestyle allow. Prioritize modifications that address your current mobility challenges and daily routines. This approach spreads costs over time and lets you test which changes make the biggest difference for you. However, if you’re planning major renovations, it’s often more cost-effective to incorporate multiple accessibility features at once rather than doing them separately.